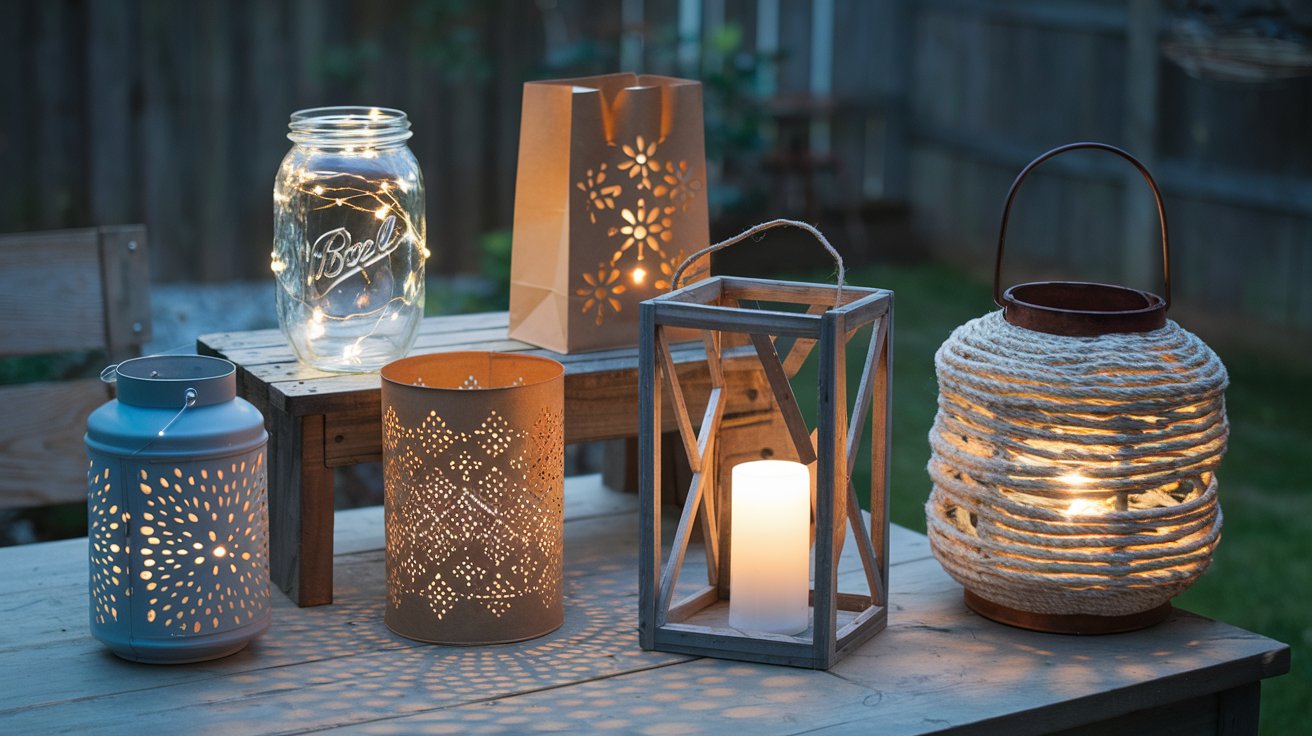
Lanterns add instant charm, warmth, and ambiance to any space. Whether you’re decorating for a cozy night in, sprucing up your patio, or creating a magical outdoor wedding vibe, making your own DIY lanterns is easier than you think.


In this guide, I’ll show you five creative ways to make stunning lanterns using everyday materials. These are budget-friendly, beginner-friendly, and totally customizable!
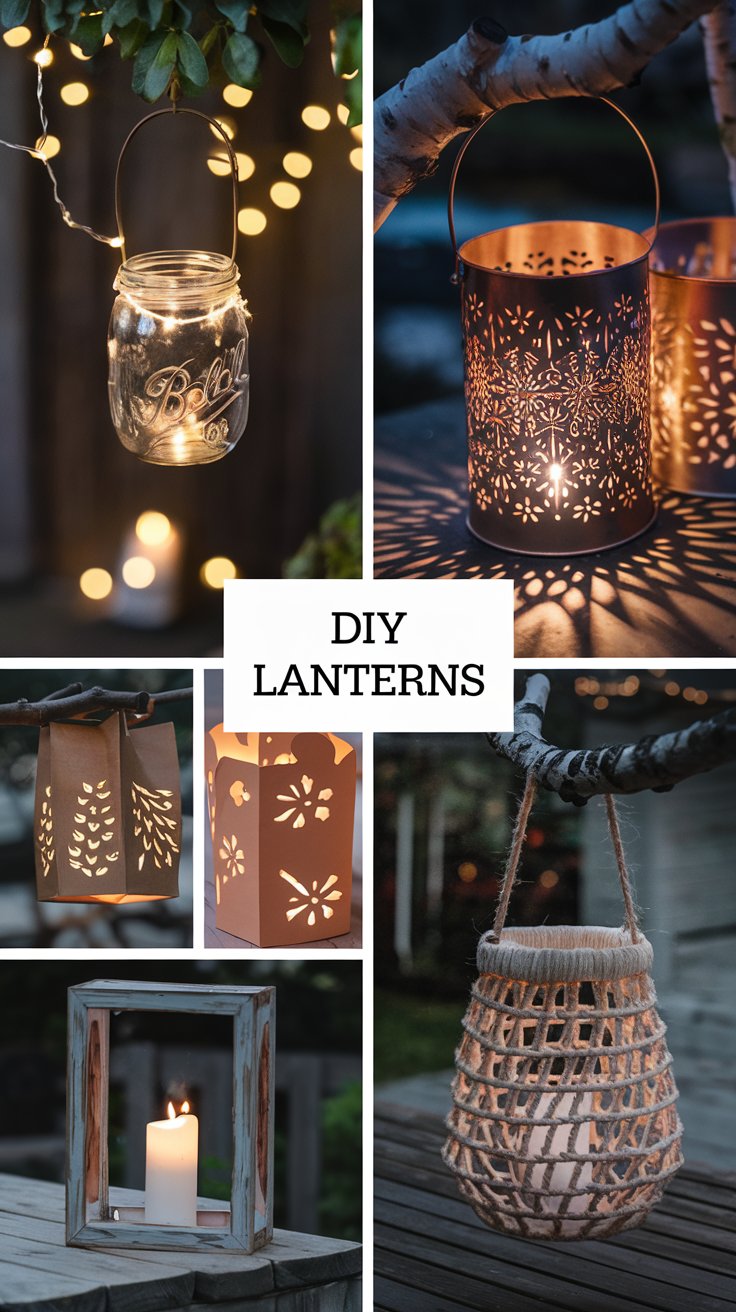
1. Mason Jar Lanterns: A Rustic Glow for Any Space
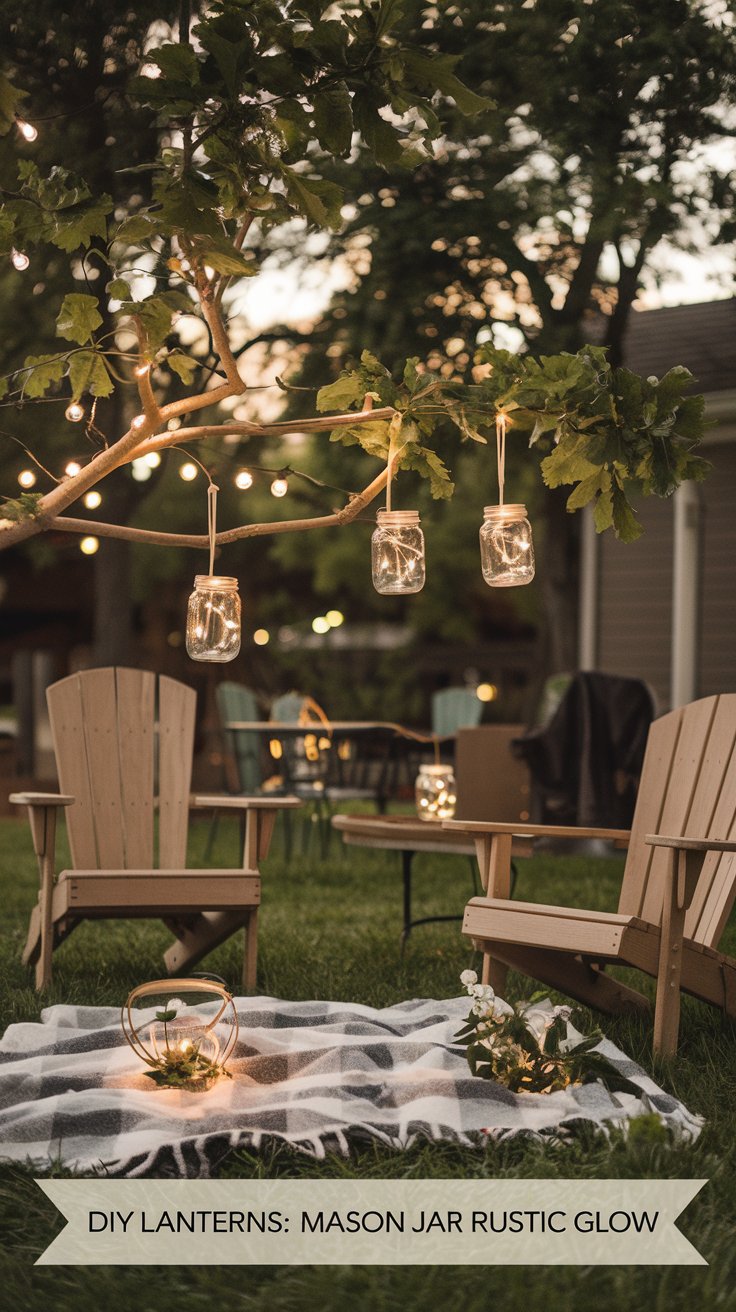
Mason jars are a DIYer’s best friend, and when turned into lanterns, they create the perfect soft glow for a cozy setting.
What You’ll Need:
- Mason jars (Dollar Tree, thrift stores, or repurposed jars)
- LED tea lights or fairy lights
- Twine or wire for hanging
- Mod Podge & tissue paper (optional for a frosted effect)
- Glass gems or pressed flowers (optional for decoration)
Instructions:
- Clean and dry your mason jar thoroughly.
- If you want a frosted look, apply a thin coat of Mod Podge to the outside and press on tissue paper or lace.
- Place LED tea lights or fairy lights inside the jar.
- Wrap twine or wire around the top of the jar to create a rustic handle for hanging.
- Decorate with pressed flowers, glass gems, or hand-painted designs for a personalized touch.
Picture This:
Imagine a warm summer evening, your patio softly illuminated by flickering mason jar lanterns hanging from tree branches. The glow is gentle, the atmosphere magical—all created by your own hands!
2. DIY Paper Bag Lanterns: Perfect for Parties & Pathways
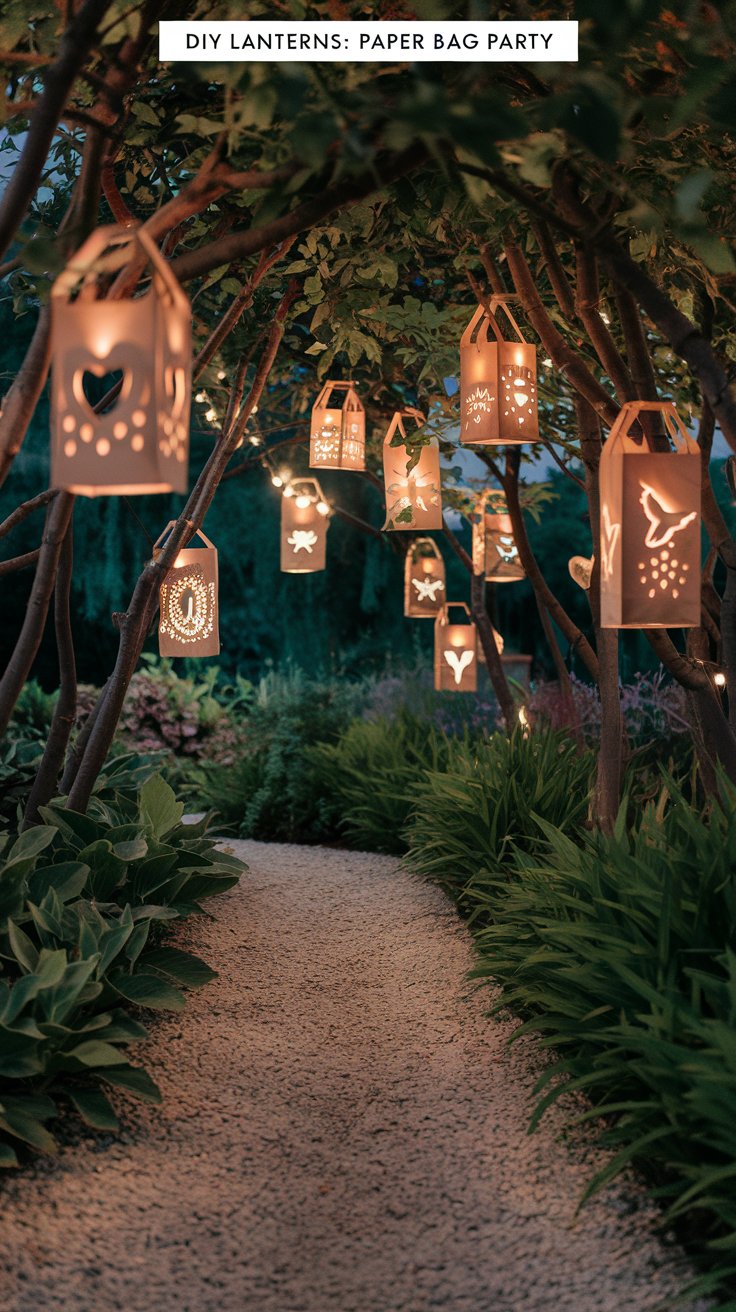
Need a quick and budget-friendly lantern idea? These paper bag lanterns are simple yet stunning! Perfect for lining a walkway, lighting up a wedding aisle, or adding an elegant glow to any gathering.
What You’ll Need:
- Paper lunch bags (white or brown)
- LED tea lights
- Hole punch, X-Acto knife, or stencil (for designs)
- Sand or small stones (for weight)
Instructions:
- Take a paper bag and punch holes or cut out designs (like stars, moons, or floral patterns) for the light to shine through.
- Add a small scoop of sand or stones at the bottom for stability.
- Place an LED tea light inside each bag.
- Arrange them along walkways, driveways, or tables for an enchanting, glowing effect.
Picture This:
A romantic backyard wedding, with paper bag lanterns gently lighting the pathway as guests arrive. The delicate cut-out designs flicker with soft light, creating an ethereal ambiance without breaking the bank.
3. Tin Can Lanterns: Upcycled Beauty with a Vintage Twist

This eco-friendly craft repurposes tin cans into beautiful perforated lanterns that cast mesmerizing patterns on the walls.
What You’ll Need:
- Empty tin cans (washed and labels removed)
- Hammer & nails (or a power drill)
- Spray paint (for a chic look)
- LED candles or fairy lights
- Twine or wire (for hanging, optional)
Instructions:
- Fill the tin can with water and freeze it overnight—this prevents denting when you punch holes.
- Use a hammer and nail (or drill) to create small holes in decorative patterns—think stars, hearts, or geometric shapes.
- Let the ice melt, dry the can, and spray-paint it in your favorite color.
- Place an LED candle inside or wrap fairy lights around it.
- If hanging, attach twine or wire through small holes on either side of the can.
Picture This:
A boho-inspired porch or patio with glowing tin can lanterns casting intricate shadows on the walls, their warm light adding depth and charm to the space.
4. DIY Wooden Frame Lantern: A Farmhouse Favorite
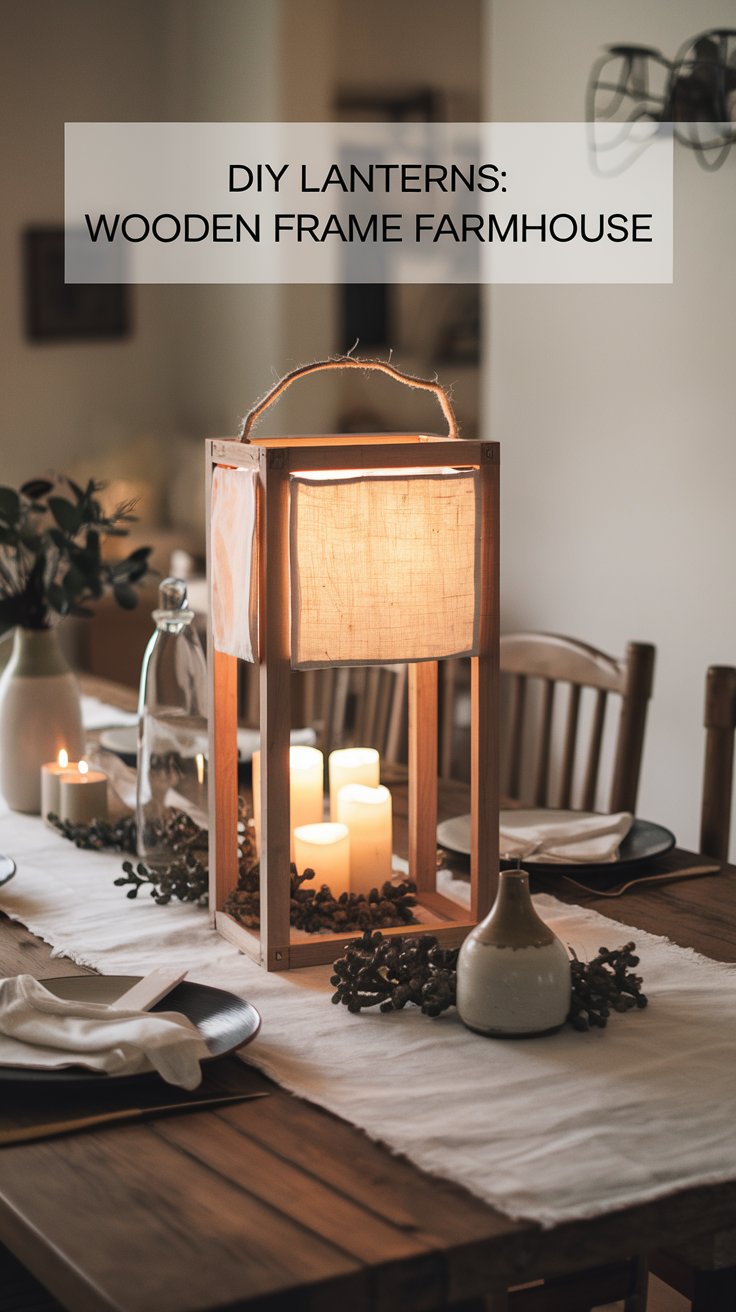
If you love rustic farmhouse decor, this DIY wooden lantern will fit right into your home!
What You’ll Need:
- Four wooden picture frames (Dollar Tree)
- Hot glue gun or wood glue
- Small wooden base (or recycled cardboard)
- LED pillar candle
- Jute twine or decorative ribbon
Instructions:
- Remove the glass from each picture frame and glue them together to create a box shape.
- Attach a wooden or cardboard base for stability.
- Paint or stain the lantern for a rustic or modern look.
- Place an LED pillar candle inside.
- Wrap twine or ribbon around the top for an elegant farmhouse finish.
Picture This:
A charming centerpiece sitting on your dining table, flickering with soft candlelight, perfect for cozy nights in or elegant dinner parties.
5. Rope Lantern: A Coastal-Inspired DIY

For a nautical or beachy vibe, this rope lantern is a must-try DIY! It brings texture, style, and a warm glow to any space.
What You’ll Need:
- A glass vase or large jar
- Thick rope (Dollar Tree’s nautical rope works great)
- Hot glue gun
- LED candle
Instructions:
- Start at the base of the jar and begin wrapping the rope around, securing with hot glue as you go.
- Continue wrapping until you reach the top, leaving an opening for the candle.
- Place an LED candle inside for a soft, beachy glow.
Picture This:
A cozy coastal corner in your home, featuring a glowing rope lantern beside seashell decorations, creating the ultimate relaxing retreat.
Which DIY Lantern Will You Try First?
Lanterns are a timeless decor element, and making them yourself adds a personal, handmade touch to your space. Whether you’re into rustic farmhouse, modern minimalism, or vintage charm, there’s a DIY lantern here for you!
Pin & Save This Post!
💡 Save this guide to your DIY & Home Decor board on Pinterest so you can come back to it anytime!
Tag Us on Pinterest & Instagram!
Which DIY lantern did you make? We’d love to see! Share your creation and tag @HooksAndHavens for a chance to be featured!


